
I had 2 motivations for this project: One, I’ve cooked a lot of complex dishes, but I’m generally pretty slow at the cooking. (There’s a lot of organizing, gathering ingredients, chopping, figuring out what I’m doing, etc.) So I wanted to create something “simple”, something that I could internalize quickly and practice making quickly, without getting bogged down by all that “thinking”.
Two, I wanted to create something with a distinct flavor profile. Something that’s uniquely me. I’ve always had a bit of a sweet tooth, so I decided to use some of the sweeter culinary ingredients, but still make it work as a savory dish. So I was drawn to sweet onions, Madeira, Balsamic vinegar, and of course, plain old sugar. Chicken was chosen a the meat of choice because of its versatility. And bacon was thrown in late in the planning phase because I couldn’t decide between olive oil and butter, and decided, what the hell, use bacon.
So what started as a simple dish ended up with a recipe with 10 ingredients and 7 steps. But let’s be honest, anyone with a lot of cooking experience ends up throwing in a lot of ingredients because we “just know” how the flavors come together. 10 ingredients, but they fit together pretty logically, and 7 steps, but they’re all part of the stirfry experience.
I promised you a recipe. I’ll give you the recipe after the cut, and then go into the writeup.
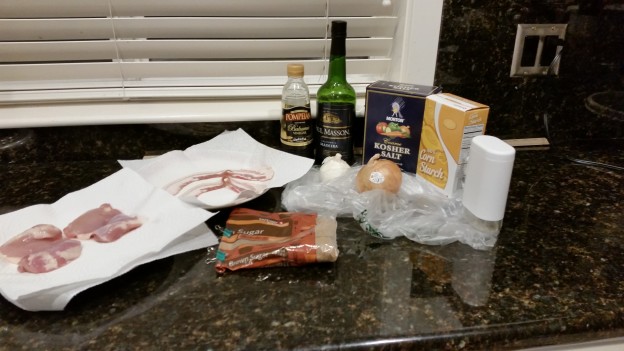
Ingredients
2-3 oz thick-cut bacon (as many slices as you can fit on a 10-inch frying pan)
8 oz chicken thighs, chopped
1/2 medium yellow onion, chopped
1 clove garlic, minced
1 Tbsp brown sugar
1 Tbsp balsamic vinegar
2 Tbsp Madeira
1 tsp cornstarch
kosher salt
white pepper
Instructions
- Bring bacon and chicken to room temperature and dry with paper towels.
- On a hot 10-inch frying pan over high heat, cook the bacon until bacon strips start to curl (about 30 seconds each side). Remove bacon from pan and set aside.
- Lower heat to medium-low heat and add the onions and garlic. Sprinkle a pinch kosher salt over the onion and garlic mixture. Saute until soft (about 10 minutes).
- While onions and garlic are cooking, chop the bacon and chicken. Mix brown sugar, balsamic vinegar, Madeira, and cornstarch to make a slurry.
- When onions are soft, raise heat to high heat and add chicken and bacon. Stirfry until chicken is fully cooked (about 4 minutes).
- Add the liquid mixture. Sauce should thicken very quickly. Stirfry until chicken and bacon are coated in sauce.
- Lower heat and add salt and pepper to taste. Serve immediately.
Serves 2.
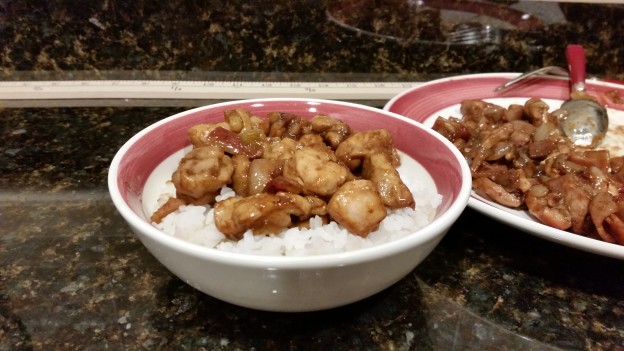
Sunday, October 5, 2014 – This was my first attempt at making the recipe. One of my goals was to time myself, from the moment I stepped foot in the kitchen to the moment where I had food on a plate. My first try, I clocked in at 1 hr 41 min. This includes cleaning the kitchen (wiping down the counters), gathering the ingredients and pots and pans I needed, and about 9 minutes of downtime because I didn’t get the schedule right. According to my notes, peeling and chopping the onions and garlic took 27 minutes, and the actual cooking took 31 minutes. It also includes 10 minutes of washing the rice and getting it into the rice cooker. (Apparently, it takes me 10 whole minutes just to make rice!)
The recipe originally called for Walla Walla sweet onions, just so I could get some local Washingtonian ingredients into the recipe. Except as it turns out, sweet onions are a summer thing. So Walla Walla sweet onions are right out. So I ended up getting Peruvian sweet onions, which are pretty much the same thing, except they grow in the Southern hemisphere where it’s summer.
But wait, Safeway is still selling Walla Walla sweet onions! Well, check the label on the onions. Most likely, they’re Peruvian sweet onions. And if they’re actually American, it makes you wonder how they got them to grow, since they’re out of season. (Check the labels before you buy, folks.)
The recipe also calls for chopping the bacon and chicken and mixing the liquids while the onions cook. My first time around, that took me 9 minutes. And as it turns out, sweet onions cook a lot faster than regular onions, so the onions were much softer than what I was aiming for. So I dropped the heat a little more when sauteing the onions.
The original recipe also called for cooking some bacon to get bacon grease, then searing the whole chicken thighs, then cooking more bacon to get more bacon grease, then sauteing the onions. Searing meats is good when you want to get a nice char and develop some flavors. But in retrospect, I don’t think this recipe needed it. The sauce adds a lot of color and flavor, so searing the chicken before cooking it isn’t necessary. Not searing the chicken beforehand also means the chicken cooks more evenly, and I save a bit of time from not having to sear the chicken.
Another interesting problem I ran into is, I was cooking 2 batches of bacon, and the 2 batches cooked differently. As it turns out, bacon cooks quickly (30 seconds per side, like the recipe says), but when there’s already bacon fat on the pan (and chicken drippings), bacon cooks even faster. Of course, this wouldn’t be a problem anymore now that I’m not searing the chicken. This also means I’m using less bacon now. (The original recipe was 4oz. Now we’re just using 2oz.)
The last thing you’ll note is that the chicken is very brown. (And I’ll note that the flavor was very sour.) This is because the original recipe called for 1 Tbsp brown sugar, 2 Tbsp Madeira, and 2 Tbsp Balsamic vinegar. Note the brown-ness of those ingredients and the extra vinegar. So I decided that next time, I should try using 1 Tbsp white sugar, 4 Tbsp Port, and 1 Tbsp Balsamic.
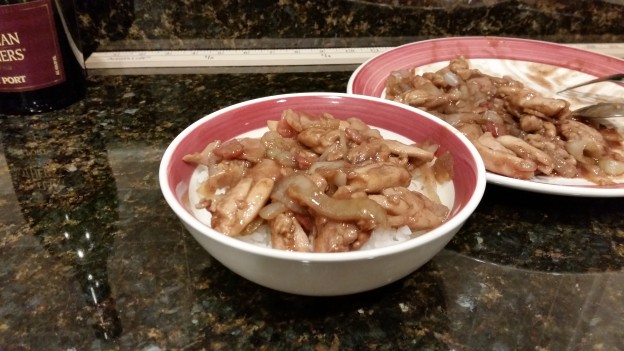
Saturday, October 11, 2014 – Week 2, attempt number 2. The biggest change here is that I didn’t bother searing the chicken beforehand. Instead, I just added the chicken toward the end and sauteed it with the onions. This worked just fine. I think this change is here to stay.
The other biggest change is I changed the recipe from 1 Tbsp brown sugar, 2 Tbsp Madeira, 2 Tbsp Balsamic to 1 Tbsp white sugar, 4 Tbsp Port, and 1 Tbsp Balsamic. If you look at the picture, you’ll see the sauce is much lighter in color and wetter. And I like the original color and wetness better. Plus, the flavor is mostly the same, so I think I’ll revert this change back to the original recipe.
I also talked about lowering the heat on the onions last time. Well, the onions were still soft, but had a distinctive crunch to them. I think I got the onions spot on.
In terms of timing, I got everything done in 1 hr 9 min, including 10 minutes of wiping down kitchen counters. Chopping everything took 23 minutes, the actual cooking took 30 minutes, and getting the rice in the cooker took 6 minutes, and I was faster with the cleaning and the in-between stuff. So overall, I’m getting better at this.
One more try just to practice getting everything down so I’m not so slow all the time.
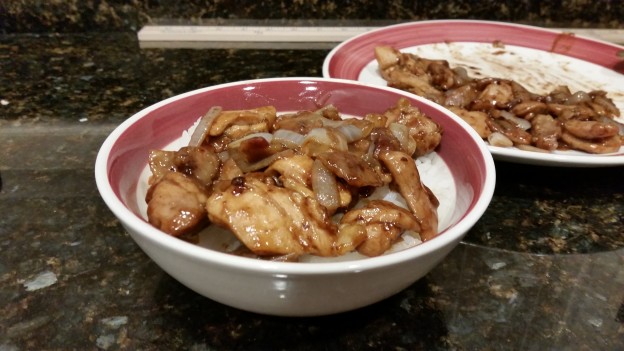
Wednesday, October 29, 2014 – Third time’s the charm. Like I said, I went back to 2 Tbsp Madeira and 2 Tbsp Balsamic. And it worked like a charm.
The only thing I’d change is bump up the bacon from 2 oz to 3 oz (or whatever amount you can fit into a 10 inch frying pan). This gets you more bacon grease. Also, I use thick cut bacon to get more grease, but really to get more bacon.
One caution is that, despite what the label on the bacon package says, an opened bacon package is only good for about 1-2 weeks. After that, the color starts getting weird, and you get less bacon grease from cooking it. Plus, old bacon probably doesn’t taste as good anyway. So yeah. Be sure to eat your bacon within 1-2 weeks of opening that package. (Or throw it out. But wasted bacon is sad bacon.)
As for timing, I took about 1 hr 13 min from beginning to end, including wiping down the counters and gathering all the ingredients (mis en place). I know people say to always gather the ingredients up front to make sure you have everything you need, but I’ve found that once you’ve internalized the recipe, as long as you did an inventory check ahead of time, it’s actually faster to grab ingredients ad hoc. This time, I mis en placed all the ingredients, mainly so I could take a cast photo, and that cost me a bit of extra time.
Overall, I think the recipe turned out pretty well. It’s simple enough that I can memorize and internalize and whip up with pretty standard ingredients, and the flavors of the sauce are great. The next step is to get other humans to eat this food and let me know their opinions. Because let’s be honest, I’m a little biased.
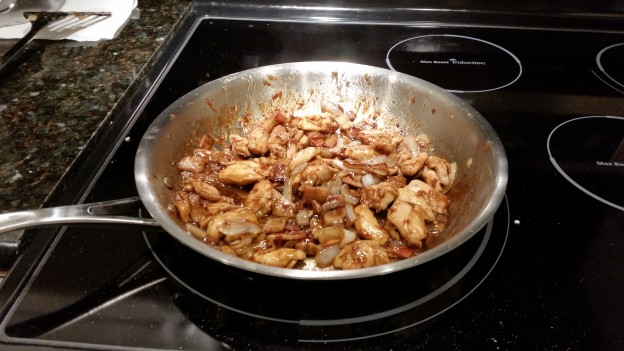
Bonus: The chicken in the frying pan.
EDIT 2016-12-31: After 2 years, I’ve tweaked the recipe ever so slightly. First, it’s not worth getting sweet onions, so the recipe now uses regular yellow onions. Second, the sauce is pretty intense, so I lowered the balsamic from 2 Tbsp to 1 Tbsp.